
Quickly, here's some results from 1/4" x 2 ft. x 4 ft. Birch Project Panel Plywood that I picked up at Home Depot. It's got Birch veneer with "whitewood" core, which you can see in the first photo. Second photo is of the cut and raster tests. After that I ran a quick 3D Raster Engrave test. For cutting with 1 pass, it looks like Power 50 Speed 14 or so works well. Rasters are also nice.


RetinaEngrave 3D Raster Engraving
FSL's software is very good overall, but the newer 3D Raster Engrave function still feels like a bit of a hack. Instead of varying the laser power for each pixel, it has to do multiple passes at a single power. I'm not sure if other lasers have the aforementioned capability to engrave with one pass or if they all work this way. That said, it works pretty well.
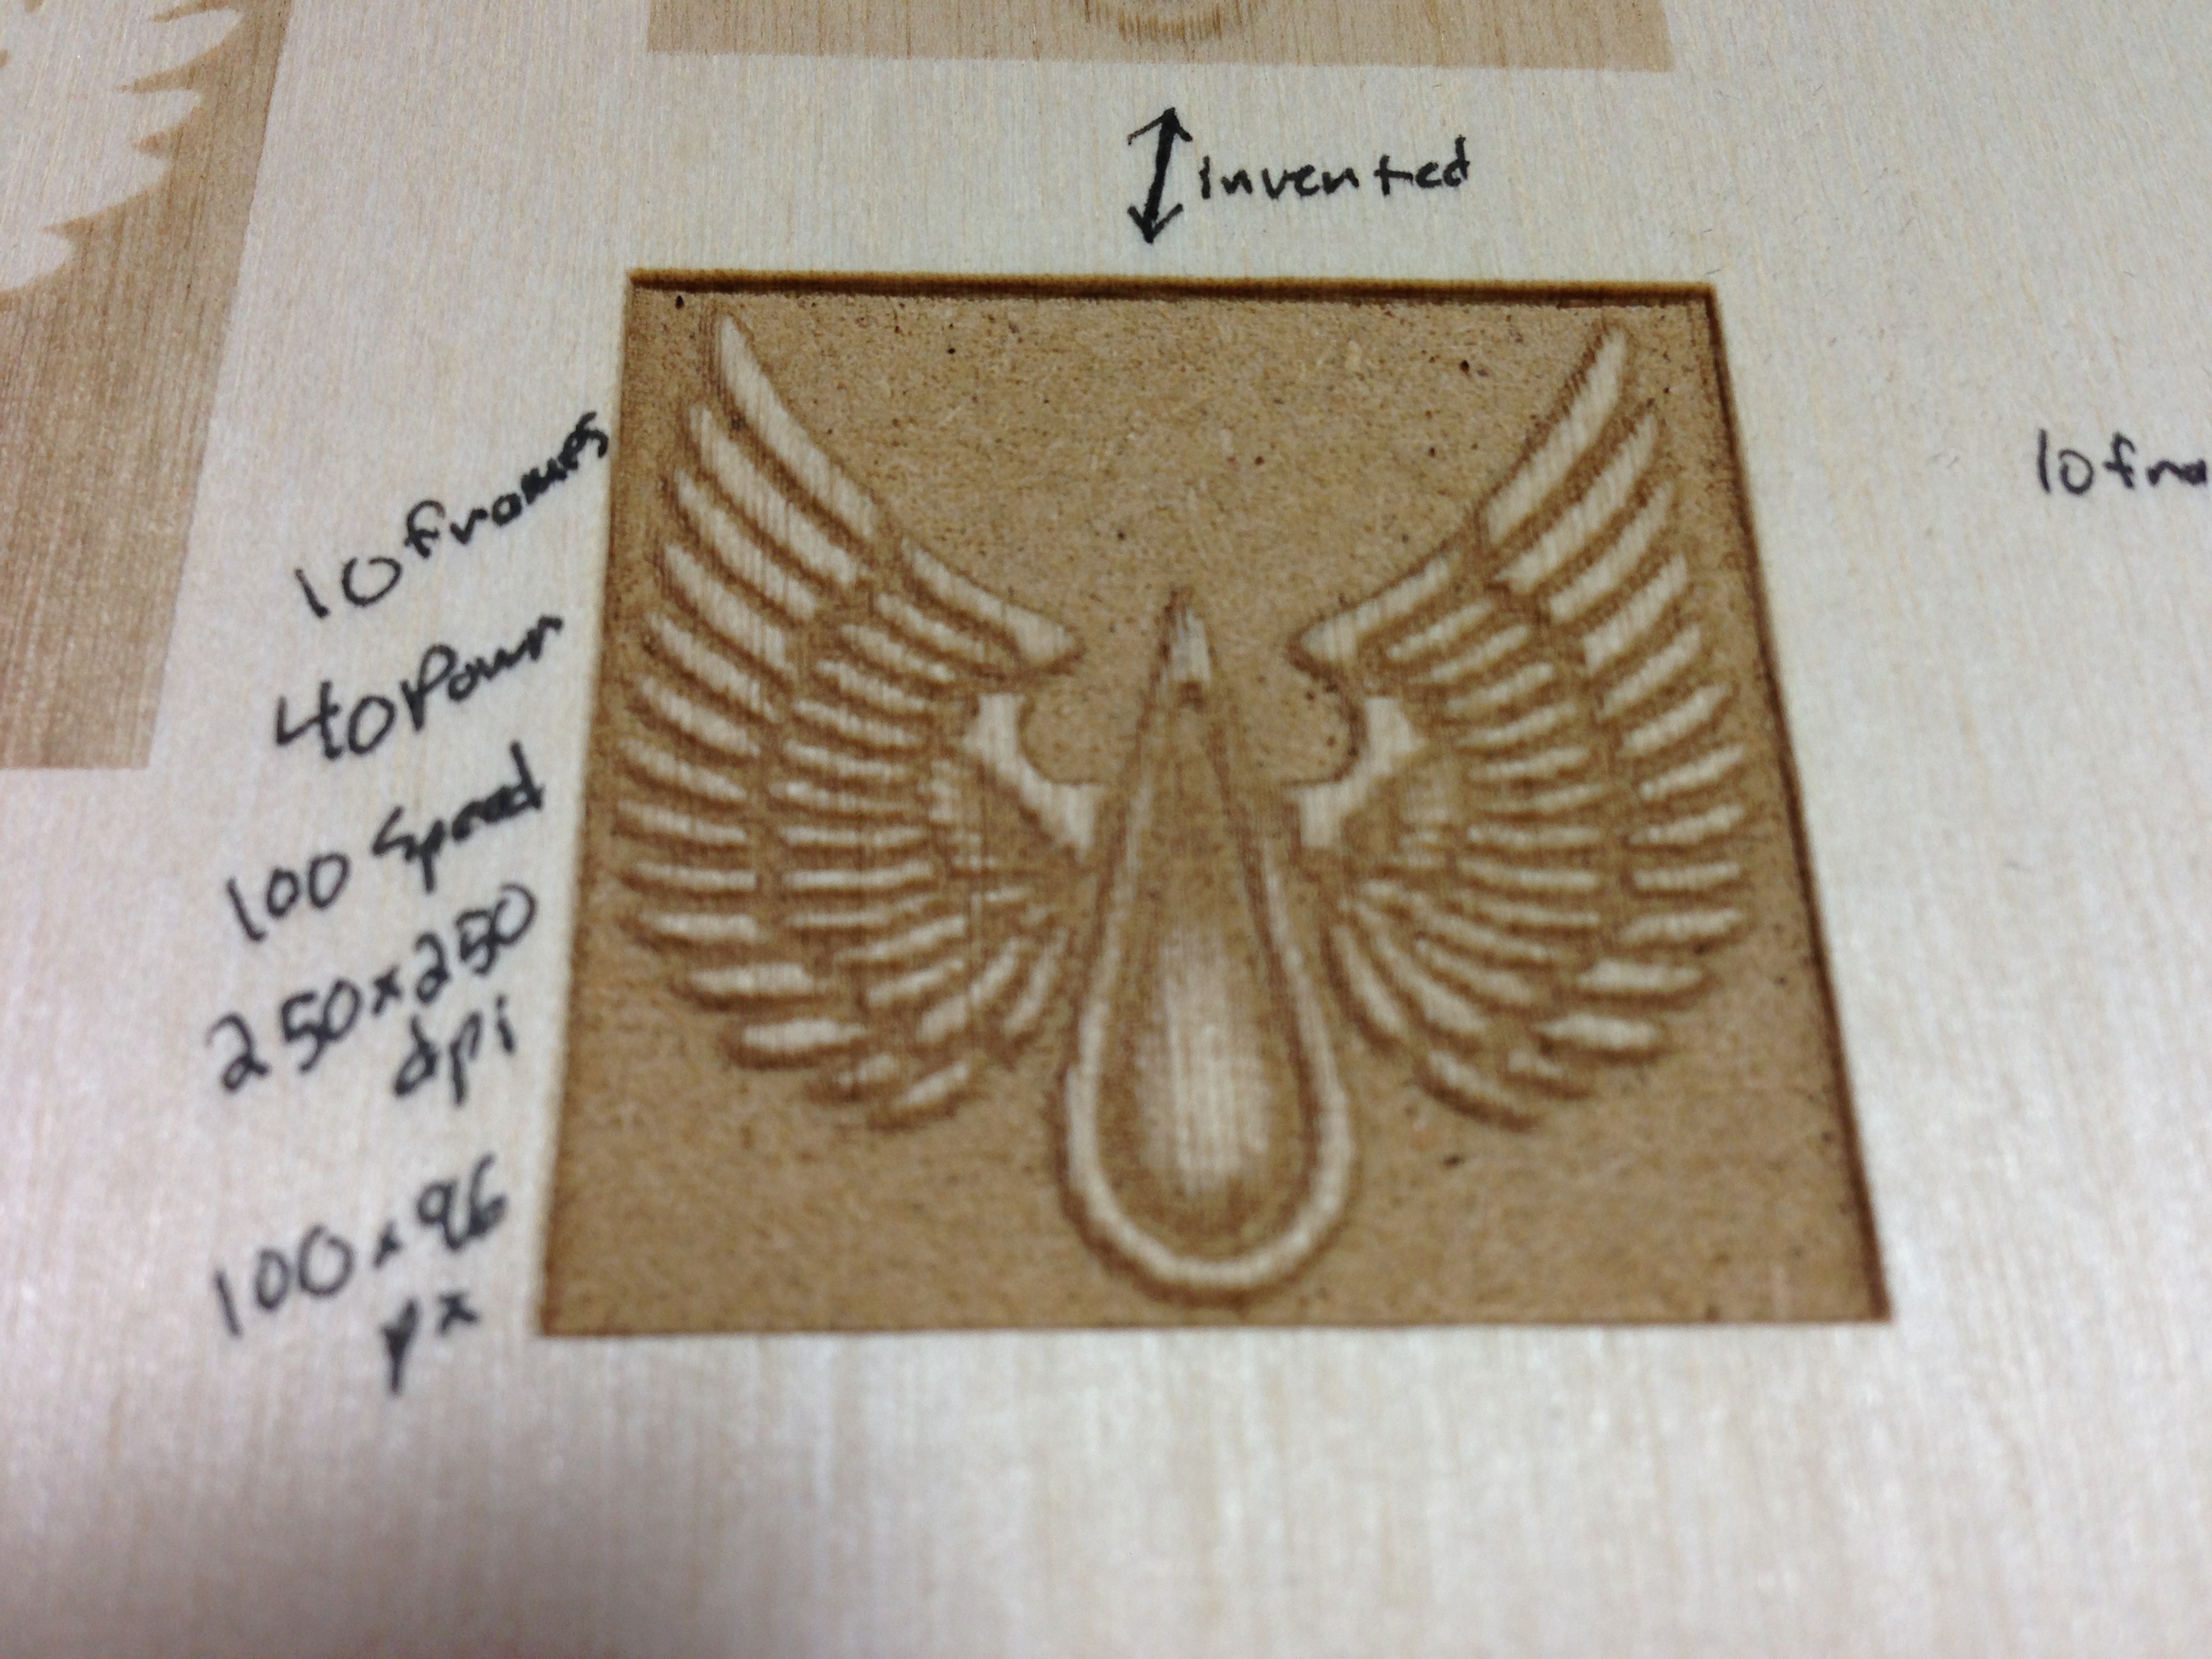
You have to Print a grayscale image to RetinaEngrave, then click the 3D Raster tab or select if from the Tabs menu if it's not visible. Then you set the Raster Power and Speed settings and the number of "frames" you want (every frame is one pass of the raster engrave), then click "Auto Generate Frames." You can also create each frame manually if desired. After creating the frames you can go back in and edit their power, speed, and threshold individually. Creating frames basically slices the grayscale image and generates a Z-depth layer for each value of gray. The more frames you create, the greater your Z-depth resolution and the more passes the laser will take. So based on the original grayscale image, in final output to the cut material, a white pixel will get no engraving, a 50% gray pixel will get engraved to half of full depth, and a black pixel will get engraved at full depth. What that depth is depends on your power and speed settings, and how many frames/passes you do. Once you have the frames generated, each frame is a black and white representation of a Z-depth layer. So with every pass, black pixels will fire the laser and will get cut another layer deeper, white will not. Hope that makes sense. It's much clearer when looking at the software.
The first try was the large box in the upper left of the "TEST" Image above. It was 2.5" and was set at 500x500dpi with 10 passes. After the second pass I got impatient and realized I could test an image a quarter that size at half the resolution, and that I needed more power. Rastering takes forever! At that size and resolution, it's doing 1250 passes on the Y axis per layer/frame. So I went back to photoshop and quartered the size, reimported and upped the power to 40 per layer and the resolution to 250x250dpi. I kept it at 10 frames. That resulted in what you see below. Not bad, and I can imagine more frames would come out even nicer. I didn't record the time it took but it wasn't fast to say the least.


Pretty cool feature and I have some interesting ideas of what to do with it when time allows. It's going to take some experimentation.
