If you have to remove a lot of adhesive backing paper from acrylic, use duct tape. I just figured this out and it is going to save me many hours of picking with an exacto knife!
Posts filed under Laser

Walnut Audi badge for Pro Clip iPhone mount
I couldn't stand looking at the "ProClipUSA.com" bubble sticker on my new iPhone mount so I quickly made this badge to match up with the walnut interior trim. Should I make more?


A little paragliding nerd time
I've decided to finally finish a "salable" design for my laser cut paraglider. I'm working on the final cut files now and finishing up the little design details. Here's part of it... a pilot! This is version 3, Getting the balance correct through trial and error.

balance
I want them to have actual paragliding line and luckily I have a ton of that. Making line rigs and tying hundreds of knots should be fun!
Walnut veneer for iPhone backs
I decided to do some walnut iPhone backs for friends after my successful etching of my own etimoe iPhone back from Monolith.
I ordered some .03" walnut veneer with sticky back from Inventables. I'm sure not the cheapest but they are fast and reliable quality wise so just for a couple of test sheets... they'll do.
After a few test cuts and engraving it's looking like it cuts nicely at Speed 90 Power 60 and engraves well at 1000 DPI at Speed 100 Power 30.

It looks nice with just some mineral oil/beeswax finish but I've also ordered some OSMO Polyx Hard Wax Oil, which is ridiculously expensive but I've been told is worth it by Monolith.
I'd love to hear if anyone has other sources for veneer with adhesive back!
The dimensions for all Apple mobile products are available on their developer page btw.
iPhone wood back etching - Dusting off the cobwebs
I've had a Monolith wood back on my iPhones for years. I love the feel of the wood instead of the glass/metal backs. Having not done any laser work lately due to other work obligations, I decided to do a quick etching on my phone back. Here's the results.
If anyone is interested I'd love to make more. Let me know ;-)
Materials update etc...
Just a quicky update. I just added a couple of things to the Materials Database... which is still behind. I replaced my tube 9/21/13, quite a while ago, and have been going full on since. Wow I haven't updated in a long time eh?! The tube upgrade went smooth, just followed the directions from FSL and it worked great first try. So good to have full power again. I've been researching a bit on getting a higher wattage tube from another supplier but haven't committed to anything yet. I'm going to upgrade once this tube starts to die. I participated in Craft Lake City last year and sold a bit over $1000 in jewelry and learned a lot... like that I never want to do craft fairs for a full time job, though I think I could do so and be successful at it. It's very stressful and the hours are super long. Having to shill your product all day and repeat yourself over and over just isn't my cup of tea. So as soon as the show was over I go my website rolling, SKIVVIES.COM. The name is a long story and probably not the best choice for a laser cut jewelry store, but I've had it for years and it was my nickname and screen name for so long that I couldn't think of anything else. So far business goes up and down with how much I'm willing to advertise. I know if I put more effort into it I'd do much better.
I've made a few new objects which hopefully I'll get around to updating soon. I'll do my best to update more often!
A Major Award, and bracelet production notes
I won! I entered my bracelets in the Full Spectrum Laser monthly free laser tube contest for June and I won... so I get a free laser tube. You can see the entire entry with photos of my setup and notes on production on flickr or click any of the thumbs below. This is awesome, because my tube is losing power. I have to cut about 10-20% slower and at 10-20% higher power to get through 1/8" 3 ply than I did when the tube was fresh. Not so good since I'm in production for Craft Lake City which starts on August 9th. Yikes. I hope I get the tube soon but I'm scared to switch out a working one for an unknown. We'll see.
I've only got about 21 bracelets about a third of the way through production, and I hope to at least double that by the fair. I need more time in my life for this. Ugh. I have lots of earrings and jewelry stands to cut too. I also need to get a website and business cards done. Yay for crunch time.


Masking update
I've been doing a bunch of cutting on the 1/8" birch from WoodCraft for a design I'm perfecting, and after trying the plastic masking film someone recommended, I decided that paper film would be better. Well lo and behold a friend just happened to have two large 12" rolls of paper transfer tape for transferring sticky-back nylon laying around his shop that I happened across. It's labeled Masking Angel Tape. It's the same cream color as standard masking tape and has a medium tack I'd guess. I tried it out today and while it masked the char well, it also left behind a nasty residue from the burnt glue at the edges which doesn't come off easily. So... strike two. Plain old blue painters tape has been working the best by a long shot, so I picked up a 3-inch roll and will be using that from now on. Stick with what works. I've seen on some 3D printer groups (they use it to print on) that they bulk order it in larger rolls ... 6 inches or more... so that might be the way to go for larger cuts in the future.
I've updated the materials database with the above mentioned birch... and have some 1/8" bamboo ply on the way from Inventables.com. Not cheap at $8.56 per square foot plus shipping, but I used the $20 gift card that came with the laser to buy it, so we'll see if it's worth the money. It can be had for cheaper in much larger sheets.
Hansolo - Multiple pass etching
My friend Hannah drew this a few days back and I asked if I could have a photo of it to play with on the laser. She sent the first image. I figured I could have some fun with depth on the engraving, so I brought it into Photoshop, and did some manipulating and painted in some grayscale corresponding to the depth of engraving I wanted. I then brought that jpg into RetinaEngrave and setup 5 passes in the 3D Engrave tab by changing the thresholds to match that of the gray of the layer I wanted, set a different power and speed for each frame, and printed away. It took about 40 minutes to do the 5 passes on the 3" x 4.14" piece... though I realized some ways to optimize this when I run it again. The thresholds in RetinaEngrave aren't very precise so it ended up having a lot of stray pixels on each frame, causing it to do tons of unnecessary passes. Next time I'll just do the separations in photoshop and do each frame in the Engrave tab. Mental note to also expand the borders of each of the layers a bit so that there is overlap because the two deeper layers left ridges as they didn't go to the edge by a pixel or so. Regardless, pretty happy with how it came out. It needs a bit of sanding cleanup as I didn't mask it so the high points got slightly charred, but I'm excited to do more of this stuff... lots of ideas.


Software Side Note
I love the manual entry controls for Relative Location and the ability to quickly design vectors in RetinaEngrave itself. This allowed me to quickly cut the border and then cut the frame with precision as I'd forgotten to add vectors for it in Photoshop. Once the laser is homed, as long as your piece isn't moved on the bed, you can do all kinds of relative work from the starting position. Very nice. Overall... the software is growing on me. It's leaps better than I was expecting for sure.
Flexible Wood and clasps
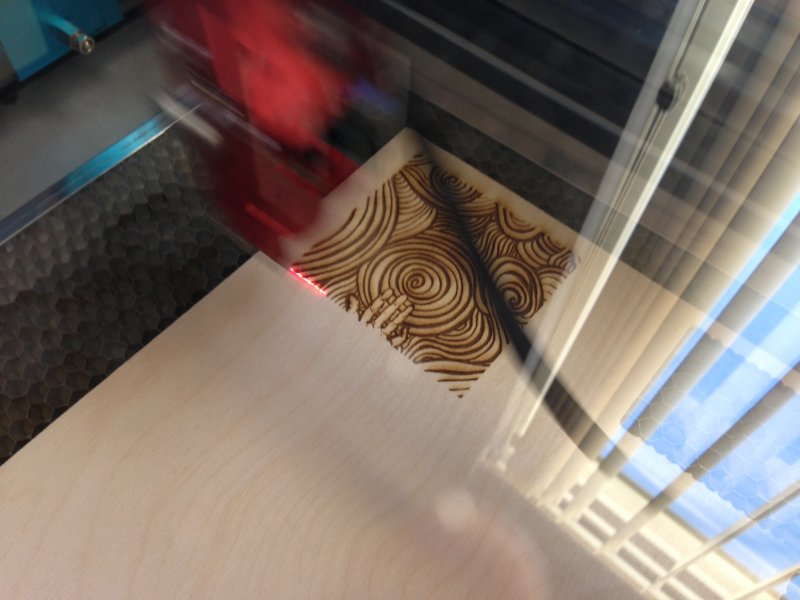
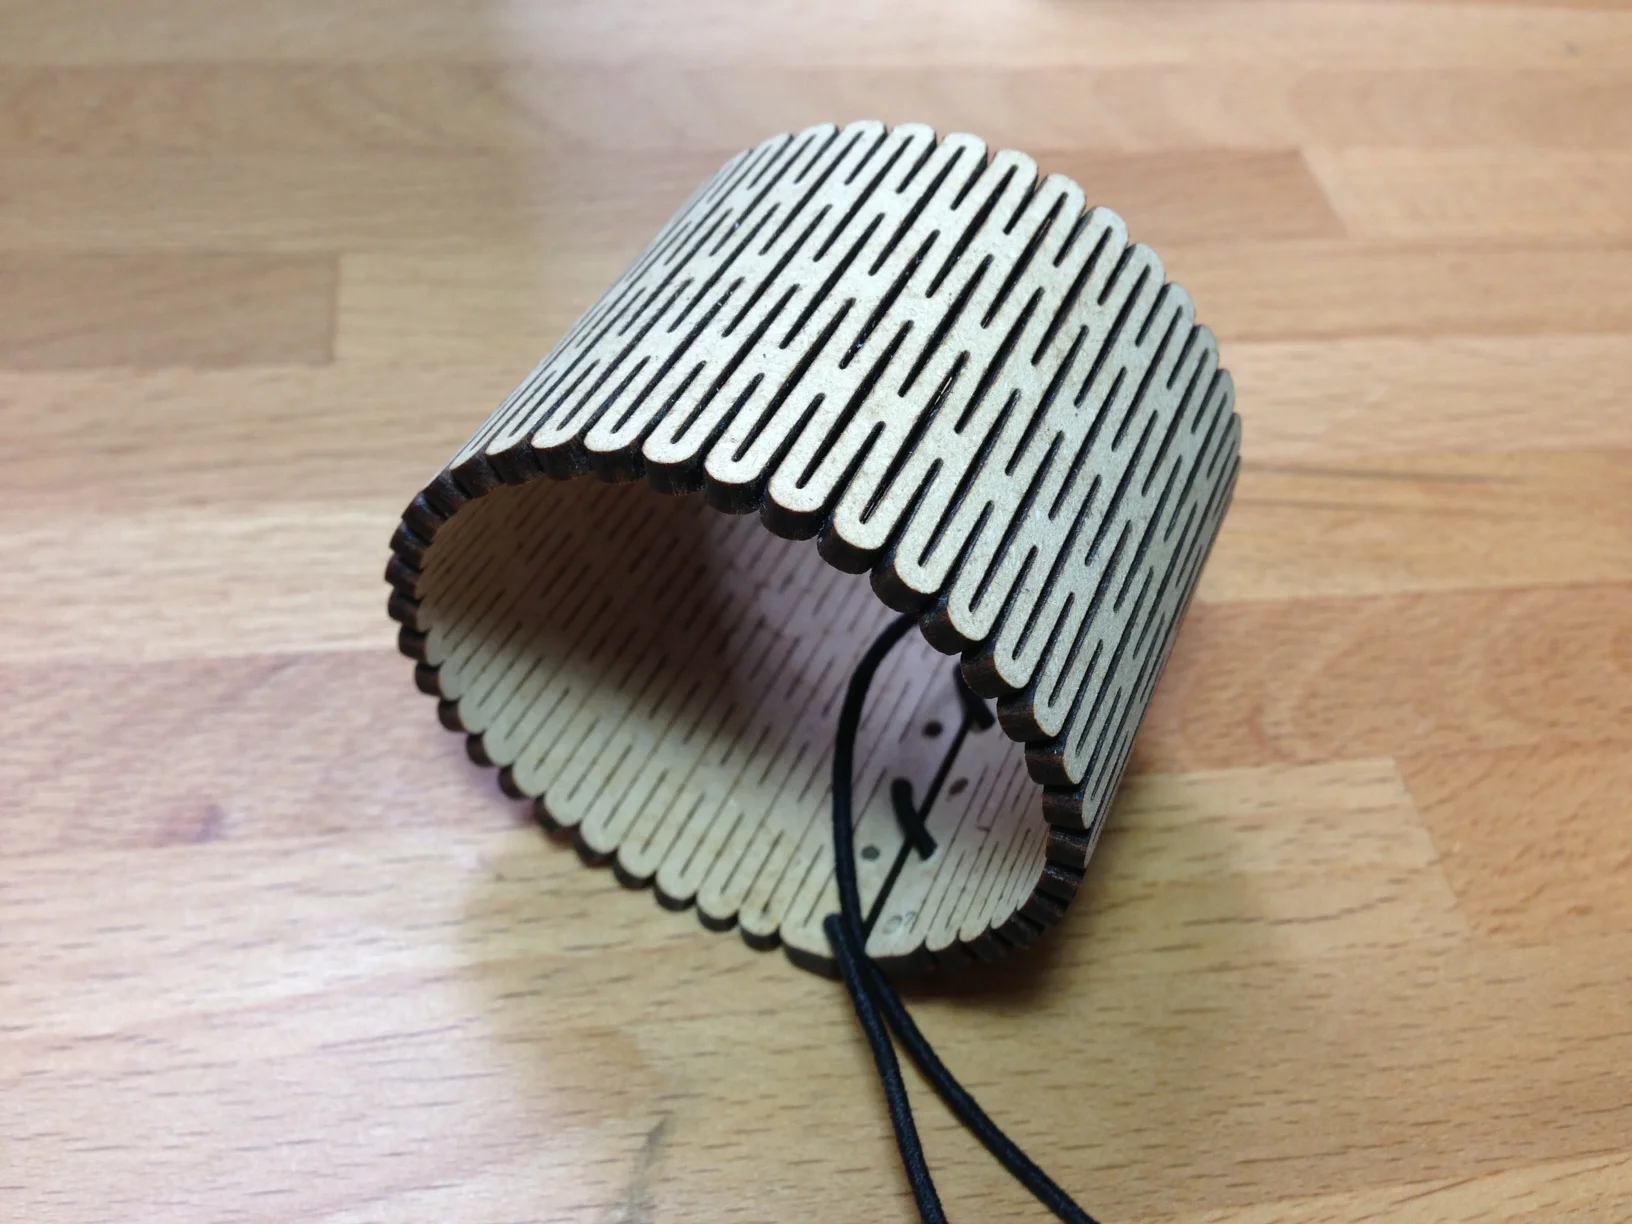
Based on a number of designs on Thingiverse (here's one, another, and another) using the flexible hinge cut, I decided to make some bracelets. It appears this hinging design was created by Snij Lab in the Netherlands. Pretty ingenious and I can't wait to try some other patterns when I get a second. So I opened up illustrator and went at it. The design is nice and modular and easy to scale. Using 1/8" MDF board I cut at Power 82 Speed 30 masked with blue painters tape and the first bracelet came out perfectly. I wet it lightly and clamped it with some binder clips overnight while it dried and it now stays in form pretty well. I need to get some thinner more stretchy shock cord so it will slide on easily. I'll experiment with finishes and other woods very soon. Also need to try out some angled patterns for the cuts.


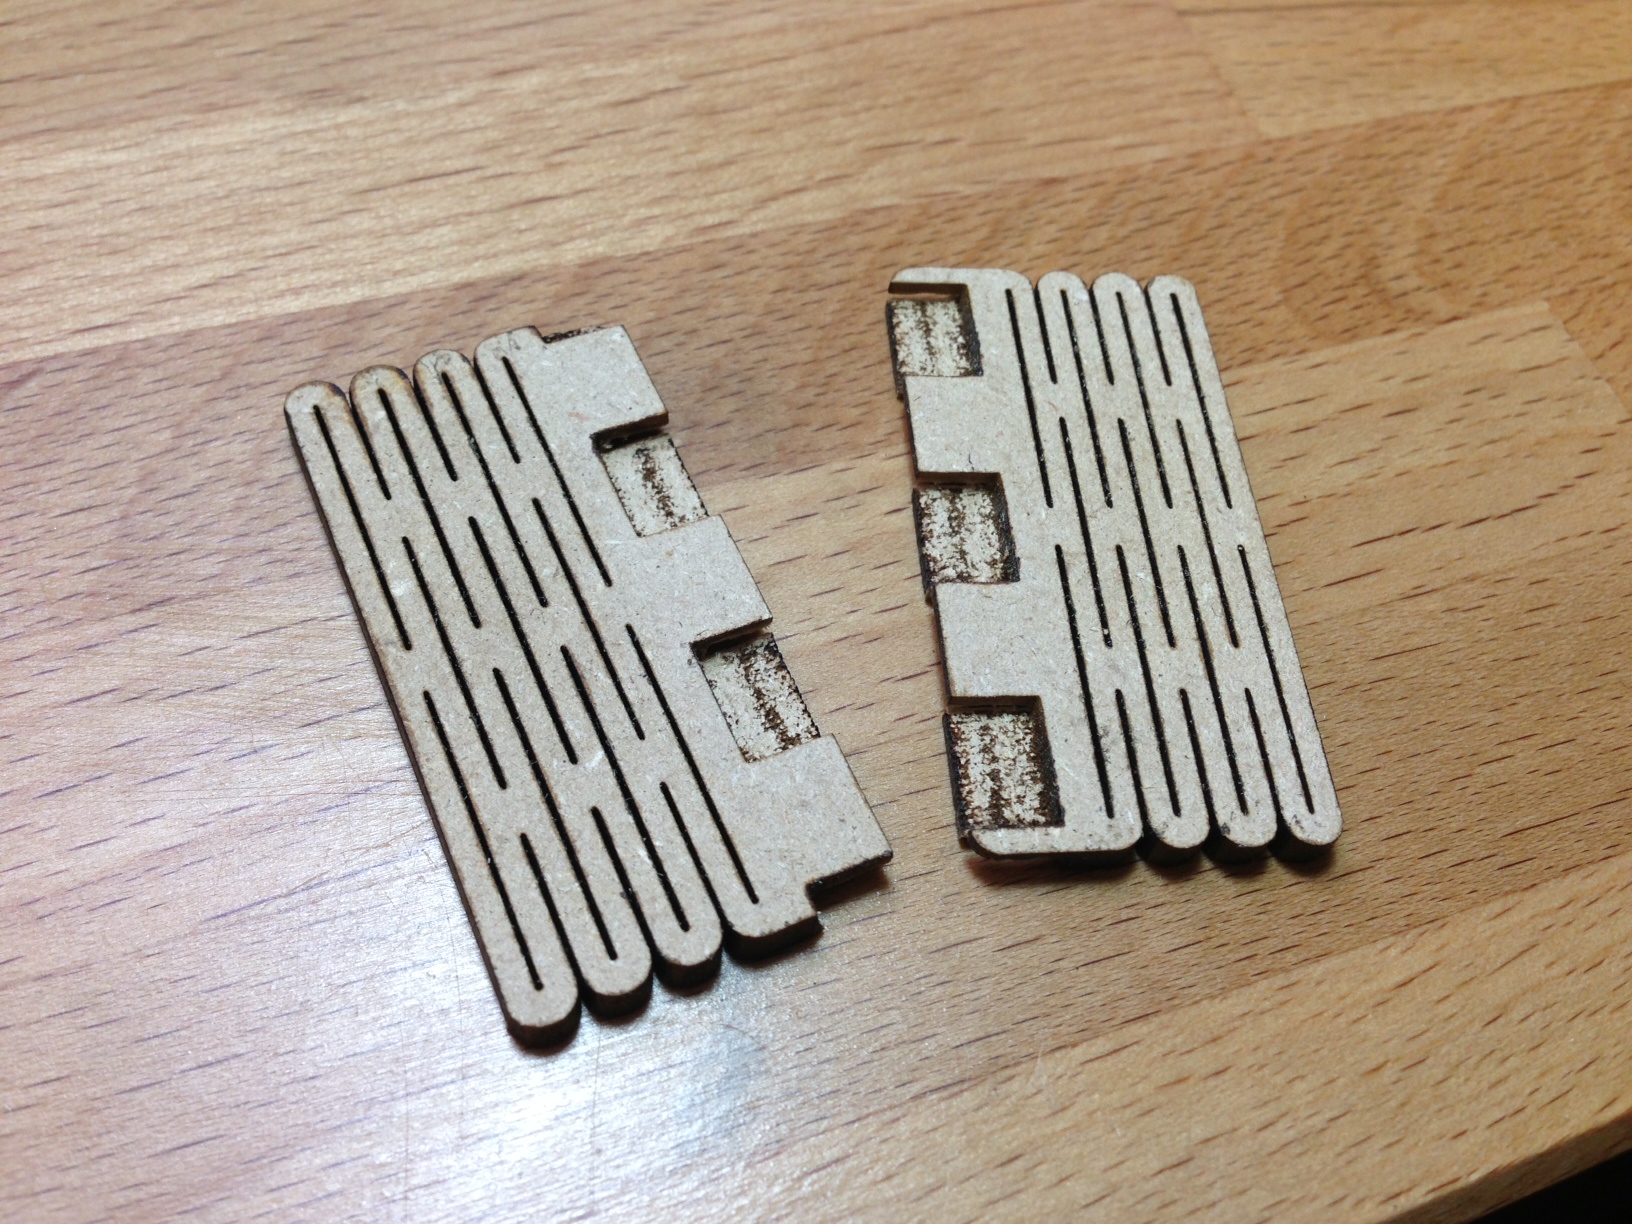
Sweet! It works. I was curious if I could come up with a more interesting clasping mechanism... so I thought I'd try and use rastering to cut half way through the wood and make a locking join. I ran a bunch of tests on the edge of the wood to see what powers would cut half way through. I settled on Power 80 Speed 20 with two passes in Raster mode. I rastered one side, then cut it, then flipped it over and rastered the other side using the sheet it was cut from as a jig which worked perfectly. I'll need to tune the tolerances as I had to do some exacto knife clean up, but it appears to work pretty well. The small pieces on the outside are too fragile as I'd expected, so I'll have to redesign it a bit. Not sure if this is viable for many uses but I'll play with it more on an actual bracelet and see.